Thursday, May 14, 2015

How to Grow Romanesco Cauliflowers

Some vegetables are born showoffs. It may be because they're loud (super-sized pumpkins), blousy (curly kale) or just plain beautiful. The Romanesco cauliflower fits into the latter category and, to the uninitiated, the precision of its intricate, geometric heads, or curds, really does earn it admiration.


The Romanesco is a member of the cabbage family. For the sake of this article and to keep things 'tidy' I've called it a cauliflower. But, the truth is, it's in a class of its own – neither cauliflower nor broccoli but somewhere in-between. Hailing from northern Italy, this approximately 500-year-old brassica has all the hallmarks of Italian design. It's suave. It's sophisticated. And it promises impeccably good taste!

Sow from spring to midsummer to give a succession of curds. Like all brassicas, Romanesco cauliflower is best started off in a fertile seedbed or in modules of seed compost/potting mix. I prefer using generous-sized module trays because this produces really solid plants, while minimising root disturbance at planting out time. Aim for a cell size that's at least 5cm (2in) across. Start your earliest seedlings off under the protection of an unheated greenhouse or cold frame.

Sow the seeds 1cm (0.5in) deep, sowing two to three seeds per cell. They can be thinned out to leave the strongest seedling once they have all germinated. Romanesco cauliflowers planted outsideGiven a little warmth they may pop up in as little as four days, but allow up to two weeks. The seeds need a minimum temperature of 10°C/50°F to germinate but once they're up the daytime temperature can happily hover around 7°C/45°F with no negative impacts on the seedlings.

Young plants that have been started off under cover will need to be hardened off before they are planted out. This will stop them from sulking at the sudden transition from relative warmth to cold. Hardening off Romanesco Cauliflower as a young plantis especially important in temperate regions or in a slow season where spring is late in arriving. To harden plants off, leave them outside during the day and bring them back under cover at night, gradually increasing the length of time plants are out of doors over a period of one to two weeks.

Romanesco cauliflowers need fertile soil – perhaps improved over the winter with plenty of well-rotted manure or compost. A final flurry of bone meal or similar organic fertiliser at planting time will encourage strong root growth.

Plant seedlings out into their final positions once they are 10-15cm (4-6in) tall. The closer the spacing, the smaller the curds, so it's really up to you how far or near you plant. I aim for 60cm (2ft) between plants and 60-90cm (2-3ft) between rows. This might seem like a lot of space, but you can always sow a quick-to-mature catch crop, such as salad leaves or radishes, in-between the rows while the plants are still young and don't need that extra space.

To plant, dig a hole for each plant then ease the root ball from its module, disturbing the roots as little as possible. Harvested Romanesco CauliflowerFirm in really well then 'puddle' the soil around the plant by thoroughly watering the ground to further settle the soil around the roots.

Tuesday, April 21, 2015

Different Type of Limes


The lime is used in cooking around the world. As a citrus fruit, it is related to the lemon, orange, grapefruit, and citron. It is the least sweet of the common citrus fruits, but its aromatic oils and strong, distinctive taste make it a popular flavoring agent. The lime family includes a number of varieties, each with distinctive characteristics and uses.


Citrus latifolia, the Persian or Tahitian lime, is the most common lime in American supermarkets. Fairly large and quite juicy, it is the most adaptable in cooking. While they have a reputation for being tart, Persian limes are less tart than Key limes. They are also easier to grow and have a thicker skin, making them more suitable for packing and transport.

Citrus aurantifolia, the Key or Mexican lime, is a small, round lime with a pale yellowish-green skin. Key limes are more acidic than Persian limes and have a distinctive aroma. The Key lime tree has dense foliage and many very sharp thorns, making them a less popular fruit crop than the Persian variety. Key limes pickled in salt water were a popular treat for children in the 1800s, as readers of Louisa May Alcott's "Little Women" will recall.

Citrus hystrix, the kaffir lime, is unique among limes for its skin, which is pebbly or warty in texture and rich in lime oil. Unlike other limes, the kaffir lime has very little juice. The leaves and zest are used widely in Thai cuisine.

Citrus glauca, the Australian desert lime, is one of the smallest limes, not much larger than a marble. It is a prized "bush food" and is made into many commercial products, including marmalade and glacéed fruit.

Citrus mitis, commonly known as kalamansi, calamondin, or musk lime, is a very tart lime that is widely used in Philippine cuisine. It is another very small lime, about an inch in diameter and orange in color. It has a very thin skin and does not store or transport well. Because the fruit takes nearly a year to fully ripen, the tree is frequently grown as an ornamental, both at full-size and as a bonsai.

The Rangpur or mandarin lime is not a true lime, as it is a hybrid of the lemon and the mandarin orange. However, because its juice is extremely acidic, it is often used as a substitute for true limes in cooking. Popular uses include pickling, candying, and being made into marmalade.

Thursday, March 26, 2015

Tips For Growing Onions

Growing Tips
Choose a site with at least 6 hours of direct sunlight.
Onions can be started 3 ways: by Sets (tiny bulbs), Transplants and Direct Seeding. Though planting onion sets is the most popular way to grow them, you'll have better results transplanting seedlings you start indoors ahead of time.

SETS: Sets are just tiny bulbs that were started from seed the year before. Although they are the easiest way to plant onions, transplants actually offer better success and store better.
Onion sets should be about the size of a marble. Larger sets don’t always adjust well and could bolt or split. For similar reasons, don’t buy sets that have already sprouted. And as with all bulbs, onion sets should be firm and healthy looking.Sets can be planted early in the season, before the last frost, but after the soil has dried and warmed a bit. Plant onion sets pointed end up and cover with about 2" of soil. Depending on the mature size of your variety of onion, space about 3-4" apart.

TRANSPLANTS: Transplants generally result in larger onions than sets. You can buy transplants or start your own indoors from seed. Start onion seed about 8 - 12 weeks before your transplant date. Plant onion seed about 1/4 - ½" deep. You can plant thickly and thin at transplant time. Keep the soil moist. As the tops grow, keep them trimmed to about 4".Transplants or onion seedlings will need to be hardened off before plantingoutdoors. Wait until all danger of frost has passed before planting.

DIRECT SEEDING: Direct seeding onions require a longer season, so warmer climates will have better luck. To direct seed, follow the directions above for seeding transplants.

Pests & Problems:

Rot: In damp soils you may encounter neck or stem rot or bulb rot. Avoid with good soil drainage and air circulation.

Splitting: Bulbs will split or double if the soil is allowed to remain dry while the bulbs are forming.

Thrips: Small yellowish-brown flying insects that feed on leaves and can cause twisting and curling. Repeated attacks cause the plant to stop growing, so bulbs don’t mature. Plant resistant varieties. Don’t plant near grain crops. Neem and insecticidal soaps provide temporary control.

Onion Root Maggots: Eggs are laid near the base of onion plants. The larvae hatch and burrow into the stems, feeding on the plants below the soil and eventually killing the plants. Rotate plants yearly to avoid infestation. Covering new seedlings will prevent eggs being laid. Diatomaceous earth is also effective.

More Onion Growing Tips:

1. Growing Larger Onions: Onion bulb size is related to the size and number of the leaves. Each leaf translates to a ring of onion. Larger leaves make larger rings. So choosing the right type of onion for your day length will give your onion tops time to form before the onion bulb begins developing: more leaves, more bulb.

2. Water stressed onions are stronger in flavor and more pungent.

3. Onion seed doesn’t store well, so only buy what you plan to use the current year.

Thursday, March 5, 2015

Tomato 'Black Cherry'


“Black Cherry” is a lovely jewel of a tomato, still fairly rare, they are the only truly black cherry tomato available. Perfectly round with the classic black tomato flavour, sweet yet rich and complex.
The plant produces huge clusters of 2.5cm (1in) round, deep purple, mahogany-brown cherry tomatoes on vigorous, tall plants. The fruit picks clean from the stem. Easy to grow and disease resistant, they can be grown in the greenhouse or outdoors in a sunny spot.


Timing: 
As they cannot tolerate any degree of frost the timing for sowing and planting outside is key to successfully growing tomatoes. Where the seeds are sown under cover or indoors, aim to sow the seeds so that they reach the stage to be transplanted outside three weeks after the last frost date. Tomato plants take roughly seven weeks from sowing to reach the transplanting stage. For example, if your last frost date is early May, the seeds should be planted in early April to allow transplanting at the end of May.

Position: 
Tomatoes require a full sun position. Two or three weeks before planting, dig the soil over and incorporate as much organic matter as possible.
The best soil used for containers is half potting compost and half a soil-based type loam: this gives some weight to the soil.

Sowing:
Plant about 3mm (1/8in) deep, in small pots using seed starting compost. Water lightly and keep consistently moist until germination occurs. Tomato seeds usually germinate within 5 to 10 days when kept in the optimum temperature range of 21 to 27°C (70 to 80°F). As soon as they emerge, place them in a location that receives a lot of light and a cooler temperature (60 to 70°F); a south-facing window should work.

Transplanting:
When the plants develop their first true leaves, and before they become root bound, they should be transplanted into larger into 20cm (4in) pots. Young plants are very tender and susceptible to frost damage, as well as sunburn. I protect my young plants by placing a large plastic milk jug, with the bottom removed, to form a miniature greenhouse.
Depending on the components of your compost, you may need to begin fertilising. If you do fertilise, do it very, very sparingly with a weak dilution. Transplant into their final positions when they are about 15cm (6in) high. Two to three weeks prior to this, the plants should be hardened off.

Planting: 
Just before transplanting the tomato plants to their final position drive a strong stake into the ground 5cm (2in) from the planting position. The stake should be at least 30cm (1ft) deep in the ground and 1.2m (4ft) above ground level - the further into the ground the better the support. As the plant grows, tie in the main stem to the support stake - check previous ties to ensure that they do not cut into the stem as the plant grows. Dig a hole 45cm (18in) apart in the bed to the same depth as the pot and water if conditions are at all dry. Ease the plant out of the pot, keeping the root ball as undisturbed as far as possible. Place it in the hole and fill around the plant with soil. The soil should be a little higher than it was in the pot. Loosely tie the plant's stem to the support stake using soft garden twine –allow some slack for future growth.

Cultivation: 
A constant supply of moisture is essential, dry periods significantly increase the risk of the fruit splitting. Feed with a liquid tomato fertiliser (high in potash) starting when the first fruits start to form, and every two or three weeks up to the end of August. In September, feed with a general fertiliser (higher in nitrogen) in order to help the plant support it's foliage. Over watering may help to produce larger fruit, but flavour may be reduced. Additionally, splitting and cracking can result from uneven and excessive watering.

Pruning:
When the first fruits begin to form, pinch out the side shoots between the main stem. Also remove lower leaves which show any signs of yellowing to avoid infection.

Harvesting:
Pick as soon as the fruits are ripe, this also encourages the production of more fruit. Harvest all the fruit as soon as frost threatens and ripen on a window sill.


Black Tomatoes: 
Black Tomatoes are native to the Southern Ukraine and their seeds were later distributed throughout Western Russia after the Crimean War by soldiers returning home from the front during the early 19th century.
Though black tomatoes originally existed in only a relatively small area on the Crimean Peninsula and were limited to only a handful of recognisable varieties, in the years to follow, new varieties of all shapes and sizes began to appear throughout the Imperial Russian Empire.
Today there are at least fifty varieties of black tomato found in the territories of the former Soviet Union, as well as nearly a dozen other types of new black tomatoes which have cropped up elsewhere, most notably in Germany, the former Yugoslavia and the United States.
Besides their extremely dark colours, black tomatoes are especially noted for their exceptionally rich, earthy tastes. Among all colours, black tomatoes are blessed with the strongest taste and are typically the most admired among true tomato aficionados.

Wednesday, February 11, 2015

Types of Feeders for Beekeeping

Learn about the different types of feeders for your Langstroth beehive, the most common hive style, and when and how to use each of them.

 Inverted Pail Feeder
An inverted pail feeder is just that: a plastic pail, usually one gallon in size, that has a small opening in the middle with a friction-fit plug with holes and a screen in it, through which the bees drink the syrup.

Once full of syrup, the pail is inverted over the inner cover hole. Just like a water cooler, the liquid is held in with vacuum pressure, but when the bees drink it, it flows easily.

This setup requires an extra hive body, which is placed around the inverted pail. The outer cover is placed on top of the hive body.

Pros:
Fairly high capacity - although must be filled at least weekly
Easy to handle
Can refill without disturbing the colony much
Inexpensive and DIY-friendly

Cons:
With very cold nights and warm days, can "pump" syrup onto the bees
Limited access to syrup means only a few bees can feed at one time
Requires an extra deep hive body placed around it


Miller or Hivetop Feeder
This type of feeder, as you might guess, sits on top of the Langstroth beehive, with the outer cover providing protection from robbing. It can hold one to three gallons of syrup. Bees enter the feeder from below via a screened access hole.

Pros:
High capacity
Can refill without removing the feeder
Can refill without disturbing the colony

Cons:
Some drowning
Heavy and awkward to move when full

Frame or Division Board Feeder
A frame feeder is a plastic container that is shaped like a wooden hive frame. It replaces two frames along the wall and can be filled with a pint or two of sugar syrup. Ribbed pieces of plastic are often inserted like ladders into the syrup so that bees can climb out.

I personally tried two division board feeders in my hives and found them full of dead, drowned bees in a week. I ended up removing them and went back to a pail feeder.

Pros:
Inexpensive
Can refill without removing the feeder

Cons:
Often heavy drowning of bees occurs
You only have eight frames in the hive body with this feeder
Must smoke and open colony to refill


Boardman or Entrance Feeder
A Boardman or entrance feeder is often provided in "starter" hive kits. It consists of a small, inverted jar of syrup that sits in a wooden device in at the hive entrance. The bees access the feed from just inside the hive entrance. Vacuum pressure delivers just a bit of syrup at a time.

Pros:
Inexpensive and often included in kits
Can refill without disturbing the colony

Cons:
Relatively small capacity
Encourages robbing because of smell and sight of syrup outside the hive
Syrup spoils quickly in the hot sun
In spring bees are not clustered at entrance so can be ineffective for feeding
Risk stinging by guard bees when refilling


Baggie Feeder
One-gallon zip-close plastic bags can be laid on top of frames. Pour roughly three quarts of syrup into a one-gallon bag, zip it up and lay it on the top bars. Use a razor blade to cut several slits in the air bubble in the top of the bag. Squeeze the bag slightly to allow a little syrup to ooze. Cover the baggie feeder with an empty super and an outer cover.

Pros:
Very inexpensive
Puts feed in easy access spot
No drowning

Cons:
Must disturb bees to refeed
Relatively small capacity
Bags are disposable; can't reuse

Wednesday, January 21, 2015

5 Easy Animals to Raise on the Small Farm


Wondering where to start with raising animals on your small farm, hobby farm or homestead? Here are some easy animals to start with, complete with all the information you'll need to learn about and decide which ones are the perfect fit for you.


Chickens are a terrific way to start raising animals on a small farm. They're hardy, easy to take care of, and don't cost much in terms of setup. A small flock can easily produce enough eggs to meet all a family's egg requirements, and a flock of a few dozen can generate a nice little egg business.

Plus, hens eat food scraps and provide great compost for the garden. On the downside, they're a free chicken dinner for every predator out there, so you'll need to keep them safe and secure to prevent losses.


Honey bees are another great choice, especially if keeping bees appeals to you. Honey crops can be abundant, and you can also harvest beeswax for lip balm, candles and other products.

Bonus: they help pollinate your crops. Negative: they cost a good bit to start up, and while they don't require a lot of hands-on care in terms of sheer hours, they do require timely care and attention, and take a while to get the hang of.


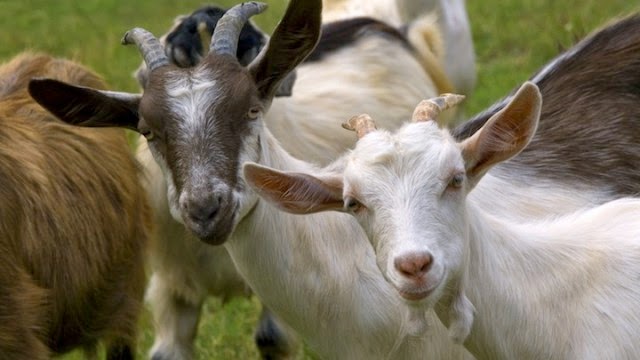
Goats are hardy, useful animals who can browse stands of small trees and shrubs, clearing land for you. They're very adaptable to poor pastures. They produce a ton of milk-okay, not a ton, but one to three quarts per day! If your family can't drink that much, you can make and sell cheese, or feed the milk to other farm animals.

On the downside, goats require strong fencing.


Like chickens, turkeys are pretty easy keeping. They can be a bit difficult to raise from poults, but once established, they do well. The market for Thanksgiving turkeys can be a big one, making them a great value-added product for a small farmer.


Pigs are also great browsers and famous rototillers. They can churn up whatever area you want, quite easily. They are also great eaters of food scraps and producers of manure.

Pigs can be vicious, so you'll want to think long and hard before getting them, especially if you have small children, and just plan to be safe around them.

Wednesday, November 5, 2014

How Much and When to Feed Chickens

Feeding backyard chickens is an imprecise science. It’s difficult to tell someone how much to feed their chickens, or even when to feed them. So many variables are involved: the type of chickens, whether they’re growing or laying, how active they are, how neat you are, the type of feeders you have, the number of free-loading pests you support, and the weather.


Use these guidelines for feeding your chickens, but alter them for your own flock.

Our modern, high-production egg breeds convert feed to eggs very efficiently, especially if they’re fed a ration formulated for laying hens. After they’re laying well, it takes about 4 pounds of a quality feed of 16 to 18 percent protein to produce a dozen eggs. The breeds kept for dual purposes (eggs and meat) generally have heavier body masses to support and need more feed to produce a dozen eggs than a lighter production breed.

It takes about 2 pounds of feed to produce 1 pound of body weight on a growing meat-type bird. So if a broiler weighs about 6 pounds at 10 weeks, it will have eaten about 12 pounds of feed. Remember that it ate less when it was small, and the amount of feed consumed increased each week. A medium-weight laying hen will eat about 1/4 pound of feed per day when she begins producing. These are rough estimates, but they give you some idea of what to expect.


If you are unsure how much to feed your chickens (and don’t want to accidentally deprive them), fill the chickens’ feed dishes so food is available much of the day, or use feeders that hold several day’s worth of feed. You can use this feeding method for all types of chickens. It’s the way chickens would eat in nature; they eat small amounts frequently.

You can continue that method if you like, or you can feed your chickens at certain times of the day. (Most people who use this method choose morning and evening.) This allows you to control the amount of feed that may attract pests. And if the chickens are too heavy, it restricts the amount they can eat. With free-range birds, it encourages them to lay and to sleep in the coop. Usually, however, it’s just a matter of preference; some people like to observe and tend to their chickens more often than others. This method works well for all but meat birds.

Because of their heavy rate of growth, the meat-type broiler chickens need to have food available to them at all times, day and night. Remember, chickens don’t eat in the dark, so the lights must be on for these birds all night. For the Rock-Cornish crosses, the lights should be on 24 hours a day, and feed should be in the feed pans at least 23 of those hours. Some people recommend an hour of no feed, but most home chicken-keepers find that difficult to regulate. Just make sure they always have feed. Laying hens, pets, and show birds are fine with restricted times of feeding and don’t need feed at night.

Be very careful not to feed moldy food, which can kill or harm your chickens, and make sure food is stored so it won’t attract rats, coons, and other pests. If you’re using a lot more feed than you think you should, pests like rats may be eating it at night. You may want to empty feeders at night or put them inside a pest-proof container for all birds other than the broiler-type meat birds.

If you need to add grit to your chickens’ diet, you can supply it in a small dish from about the fifth day of life. Chicks should be eating their regular feed well before you add grit, or they may fill up on it. Make sure the dish is covered or narrow so the birds don’t dust-bathe in it. Discard it and add clean grit if it becomes contaminated with chicken droppings.

Tuesday, October 21, 2014

How to Store Sweet Potatoes

Sweet potatoes can last for several months when stored properly, but you need to follow proper storage procedures carefully in order to prevent them from bruising or spoiling. Here's what you need to know about storing sweet potatoes at both room temperature and freezing temperatures.

1. Use fresh, fat sweet potatoes. Newly harvested sweet potatoes with the roots still attached are the best option to use.
Plump sweet potatoes store just as well as skinny ones, and they have more usable "meat" to consume.
If harvesting the sweet potatoes yourself, use a spade fork to dig 4 to 6 inches (10 to 15 cm) beneath the soil in order to get all the roots up. Handle them carefully since sweet potatoes tend to bruise easily, and shake off excess dirt but do not wash the roots.

2. Cure the sweet potatoes for 1 to 2 weeks. Keep the roots in a room or other location that reaches between 75 and 80 degrees Fahrenheit (24 and 27 degrees Celsius) with relative humidity of 90 to 95 percent.
The sweet potatoes need to cure for at least 7 days, but they can be kept there for as many as 14 days.
The curing process creates a second skin that forms over scratches and bruises, allowing the sweet potatoes to last longer in storage.
Use a small electric fan in the area to keep the air circulating. This helps to prevent rotting and molding.
Monitor the temperature and humidity regularly to make sure that the sweet potatoes are sitting in the conditions needed for proper curing.
For best results, keep the sweet potatoes from touching each other as they cure.

3. Discard bruised sweet potatoes. After the sweet potatoes have finished curing, throw away any that appear bruised, rotting, or moldy.
Bruised sweet potatoes have not cured correctly, so they will not last as long as the other sweet potatoes and may even cause the other sweet potatoes to spoil faster.

4. Wrap each one in newspaper. Individually wrap the sweet potatoes in sheets of newsprint or in brown paper bags.
Newspaper and brown paper bags are both fairly breathable, providing just enough air circulation to prevent the sweet potatoes from rotting too quickly.

5. Pack the sweet potatoes in a box or basket. Store the individually-wrapped sweet potatoes in a cardboard box, wooden box, or wooden basket.
Do not use an airtight storage container.
Place an apple in the box.The apple will help prevent the sweet potatoes from budding.

6. Store in a cool, dark location. Keep the sweet potatoes in an area that is consistently between 55 and 60 degrees Fahrenheit (13 and 16 degrees Celsius).
For best results, store the sweet potatoes in a basement or root cellar. If neither option is available to you, store them in a dark, cool, and well-ventilated cupboard or pantry away from strong heat sources.
Do not use a refrigerator.
Monitor the temperature frequently to make sure that it does not fall below or rise above this range.
Stored in this manner, the sweet potatoes can last up to 6 months. Remove them from storage gently to prevent bruising.

Thursday, September 18, 2014

Top 10 apples to grow in your garden


1. 'Chivers Delight'

This is a late flowerer and cropper referred to in the trade as a 'Cox Plus'. It has as much flavour (if not more) than 'Cox's Orange Pippin' and better acidity, which it keeps in storage. Cox famously go woolly quickly in storage, whereas the flesh of 'Chivers Delight' remains firm and nutty. This fell out of commercial favour because of its colour irregularity. If the sun is on it, the fruit goes red, but it will not colour up on the shady side. This does not affect the flavour but makes them difficult to sell.

2. 'Spartan'

Nothing has the same richness of colour as 'Spartan', a lovely deep plum red, with almost bright white, contrasting flesh. It's a beautiful apple, which stays late on the tree and makes a fabulous eater with very juicy fruit. It's the one I use at Perch Hill for Christmas wreaths and, being a good storer, is widely available late in the year.

3. 'Blenheim Orange'

A fabulously aromatic, peppery, almost spicy apple with a softer nuttiness than you get with the similar-flavoured 'Egremont Russet'. This variety is a bit prone to scab, so is best grown on its own and certainly away from very scab-prone varieties such as 'Crispin'.

4. 'Egremont Russet'

A famous apple with a wonderful nutty, woody texture and a very characteristic taste, floral and heady, so you can almost smell the blossom. It stores well, with the flavour deepening to honey.

5. 'Pitmaston Pine Apple'

This is a very unusual apple, difficult to find but, in Henry's view, worth the effort. It eats like a 'Greensleeves' early on, but you can store it until April when the flavour morphs into pineapple.

6. 'Greensleeves'

A light, crispy, full-of-flavour apple, lovely and crunchy straight off the tree. This is the one 'Golden Delicious' aspires to be, with excellent flavour in a beautiful pale yellow fruit.

7. 'Discovery'

This is one of the first to harvest (in August), so Henry loves it for reminding us what we've been missing all summer. If we get a sunny July and August, the redness leaches from the skin into the flesh. Then if you press it, you'll have a beautiful pale pink juice.

8. 'Worcester Pearmain'

A rich, creamy apple with a really strong flavour, one of the original varieties brought over by the Normans. It's just about surviving in the UK, but you don't see it often, apart from in the Wye Valley where it's usually pressed into juice.

9. 'Howgate Wonder'

A great all-rounder apple – a good cooker early on, it also presses well and mellows the later you leave it, with the acidity dropping away, so it can be eaten as a dessert apple from the store or tree. It's one of the few varieties where you can leave the fruit on the tree, start harvesting in August and carry on until the end of October at least. It performs well whatever the weather and is often a challenger for the largest fruit.

10. 'Médaille d'Or'

Monday, June 16, 2014

How to Microchip Your Goat for Easy Identification

If you live in a state that doesn't require identification, you don't have to permanently identify unregistered goats. If you get a registered goat, it should already have a microchip or tattoo, and if you want to register a goat that is eligible for one of the registries, you will be required to permanently identify it to prove that the goat is who you say it is. You also may want to permanently identify your goats even if you aren't required to. You never know when you might have to prove that they're yours — if they get lost or stolen, for example.


Microchips come in sterile, individual injectors that look like a large syringe and needle. Each is sealed, has a unique number, and includes several stick-on labels imprinted with the number. The microchips can be read only with a special microchip reader.

The best place to insert the microchip is in the tail web (the loose, hairless area under the tail on either side of the anus). Always use the left side to make finding the microchip easier.

You need a cotton ball, some rubbing alcohol, a microchip in its injector, a microchip reader, and registration papers and/or another form to record the number. (A reader is not required for microchipping, but by having one, you avoid the small chance of error in recording the number.)

Here are the steps you take to microchip your goat:

Get your supplies together.

Remove the microchip injector from its container, being careful to keep the needle up so the chip doesn't fall out, and scan it. Confirm that the number scanned is identical to the number on the stick-on labels.

Secure the goat on a milk stand or have a helper hold the goat on her lap.

If you're using a helper, have her hold the goat with the head to one side, the legs secured between her legs, and her arm wrapped around the goat's side holding the tail up. She can hold the legs with the other hand for more stability.

Clean the insertion area with alcohol.

If you have a goat that may have been microchipped previously, scan the area several times to verify that no chip is implanted.

Insert the needle just under the loose skin for several inches, pressing upward at a nearly parallel angle.

Press the plunger until it stops.

Remove the needle and apply pressure for a few minutes at the injection site to prevent the microchip from coming out and to stop any bleeding.

Scan to locate the implanted microchip.

Verify the number against the stick-on labels. Place a label on your form and registration papers, if applicable, and record the animal's name.

Wednesday, May 28, 2014

The Benefits of Raising Goats


You get a lot from keeping goats. Raising goats can help you achieve a sustainable lifestyle. You can milk them or eat their meat, use their fiber and their skin for making clothing, and even use their dung for fuel (if you are so inclined).


You may want to raise goats for a variety of reasons:

Becoming more self-sufficient: Goats can give you milk to drink and food to eat, and even help you carry your belongings when backpacking.

Cutting your dairy bill: If you raise dairy goats, you might not have to buy cheese or milk ever again. Your goats need to have kids to give you milk, and then you can milk them throughout the year for up to three years without re-breeding.

Raising your own meat: Goat meat has always been popular in the developing world because goats are much more affordable and use fewer resources than animals such as cows. According to the U.S. Department of Agriculture, the demand for goat meat is expected to continue growing.

Growing your own fiber: Some of the finest fiber comes from goats: Angora and Pygora goats produce mohair, cashmere goats produce cashmere, and crosses between the two breeds produce a fiber called cashgora.

If you raise fiber goats, you can spin your own yarn and make hats, blankets, sweaters or other products. You can also sell the fiber to spinners or to companies that make these products.

Harnessing goats' power as living weed whackers: Goats are well-known for their ability to wipe out weeds. In fact, some people have made businesses out of renting out their goat herds to cities and other municipalities to clean up areas that are overgrown with weeds or blackberry bushes. These leased goats decrease the need to use herbicides, improve the soil's fertility, decrease the risk of fire, increase the diversity of plants in the area, and control weeds in hard-to-reach areas, such as steep hills.

Breeding and selling: Unless your goats are just pets or brush eaters, you probably want to breed them. If you have dairy goats, you need to breed them to keep a good supply of milk flowing. And you need to replace any goats you sell or slaughter.

Keeping goats as pets: You can leash train goats and take them on walks throughout the neighborhood or around your property, which provides exercise for all of you.

Using your goat for packing: Goats are social animals and, after you establish a relationship with them, they love to spend time with you. They enjoy going for hikes and can carry your belongings; they find plenty to eat right there in the wilderness.

Raising goats as a 4-H project: Getting children involved in raising goats is a good way to teach responsibility. Keeping goats requires twice-a-day chores. Children quickly learn that the goats depend on them. They also find out about the cycle of birth and death and get outdoors to get regular exercise.

Tuesday, May 6, 2014

Biggest dog and smallest dog in the world

Giant George the Great Dane, who's almost 5 years old, measured 3 feet 5 inches from the ground to the top of his shoulders, and 7 feet 3 inches from his tail to his nose. On the other end of the canine spectrum, Boo-Boo the Chihuahua measured only 4 inches tall and 6.5 inches long.

George is so large, owner Dave Nasser and his wife, Christie, have to be careful to make sure he doesn’t walk near their 1-year-old daughter Annabel because she’s too little.

“He eats about 110 lbs a week,” the dog’s owner, Arizona-based real estate investor Dave Nasser, said.

That’s the equivalent of 30 Nathan’s hot dogs, an official from the Guinness Book of World records pointed out. At 245 lbs, he weighs as much as the average New York Giants football player.


In a stark contrast, Boo-Boo, at 1.5 lbs., is smaller than a slice of New York pizza.

When the tiny toy Chihuahua was born from C-Section, she was a third of the size of the other puppies, said owner and Kentucky resident Lana Elswick, a former Chihuahua trainer.

“She’s lucky to be alive,” Elswick said about 4-year-old Boo-Boo, who has been record-holder since 2007. “She weighed less than an ounce. I had to feed her from an eyedropper because she was too little to nurse.”

The two dogs may be different, but both seemed equally confused at the Guinness Book of World Records event.

“George is really smart, but I think that it even took him a few minutes to figure out that Boo-Boo was a real dog,” Nasser said.

Thursday, April 10, 2014

How to Raise Nigerian Dwarf Goats

 Nigerian Dwarf Goats are miniature, sweet and easy to keep. Let's go over the basics.


1. Food is important. A good recommendation is to feed the goats Eastern Grass Hay, or Alfalfa mix. Note: If you have wethers and Bucks, that are older, do NOT feed Alfalfa, as it can cause Urinary Calculi. You can also feed kids (0 days-12 month old goats) COB (Corn Oats and Barley) and some Calf Manna. A good place to start is to feed the babies a mix of 2 cup COB and 2 cup Calf Manna, and give them each get a cup of the mix. These are just example measurements, so do research!

2. Have fresh hay as a free choice. You can also have a salt-lick block as free choice. Above all, you need fresh, cold and clean water!

3. Think about a shelter for cold, winter nights even if it's summer.You must clean or "Muck" out where they stay at least every day. Shelters that can be enclosed so that nothing but air and light can get through is ideal. Small babies are easy targets for coyotes. Make sure it's warm, dry and comfy so when the weather gets harsh, you are ready.

4.  Care products. If anything goes wrong, you'll have the supplies.

5. Make sure to have enough feed, water and space for as many goats as you are keeping. Only so many acres can support a goat. You don't need spacious acres with lush green pasture and browse running miles long, you just need a pasture, a shelter, nutritional supplies, health supplies and lots of love and compassion for your little bundle(s) of joy.

Monday, March 17, 2014

8 Benefits of Being a Cat Owner


The war between cat and dog people is vicious and will probably never end. Here’s some ammunition for the next time you're talking to one of those horrible dog lovers.


A study of British pet owners found that people who owned cats tended to be smarter than their dog loving counterparts. Both in terms of IQ score and overall level of education, people who own cats come out on top in the brains department. It’s probably not the cat itself making you smarter, though; the researchers conducting the study said that smarter people tend to work longer hours, and since cats require less attention than dogs they are a better choice for the busy intellectual.

If you're worried about your carbon footprint, it’s better to own a cat. A 2009 study found that over its lifetime, the resources needed to feed a dog make the same eco-footprint as that of a Hummer. Meanwhile, cats—which eat less in general and are more likely to eat fish than corn or beef flavored products—only have the approximate carbon footprint of a Volkswagen Golf.

Losing a loved one is incredibly painful, but one of the best ways of coping is to own a pet. Cats have been shown to help people get over their loss more quickly, and show less physical symptoms of pain, like crying. Despite the fact that they are only animals, cats serve as a social support during difficult times. People in mourning report talking to their pet to work out their feelings, since it is often easier to talk to something that won’t respond and can’t judge than to another human being.

If you’re a single guy and you can’t seem to get a date, get a cat! A British poll found that 82 percent of women agreed they are more attracted to men who like animals. And while having a dog will do wonders for your dating life, a whopping 90 percent of single women said that men who own a cat are “nicer” than other guys. It seems women buy into the stereotype that cat owners are more sensitive and thoughtful, so listing that you own a cat on your dating profile could do wonders for the number of responses you get. But remember, a cat is for life, not just until you find a partner.


Owning any pet is good for your heart. Cats in particular lower your stress level—possibly since they don’t require as much effort as dogs—and lower the amount of anxiety in your life. Petting a cat has a positive calming effect. One study found that over a ten year period cat owners were 30 percent less likely to die of a heart attack or stroke than non-cat owners.


The stereotype that dogs are more affectionate than cats is just that: a stereotype. In fact, it turns out that cats can be just as good companions as dogs, especially for women. A 2003 Swiss study found that having a cat in the house is the emotional equivalent of having a romantic partner. As well as initiating contact much of the time, studies have shown cats will remember kindness shown to them and return the favor later.

But cats really do have the upper hand in these relationships. After thousands of years of domestication, cats have learned how to make a half purr/half howl noise that sounds remarkably like a human baby’s cry. And since our brains are programmed to respond to our children’s distress, it is almost impossible to ignore what a cat wants when it demands it like that.


Owning a cat tells people a lot about your personality. While dog lovers tend to be the life of the party, cat owners are quieter and more introverted. However, they score very highly when it comes to how trustworthy they are and how much they trust other people. Cat owners are also less manipulative and more modest.


Monday, February 24, 2014

10 Benefits of Being a Dog Owner


The war between #cat and #dog people is vicious and will probably never end. Here’s some ammunition for the next time you are talking to one of those horrible #cat lovers.


If our cleaning commercials are to be believed, humanity is in the midst of a war against germs—and we won’t stop until every single one is dead. In reality, the amount of disinfecting we do is making us sicker; since our bodies are exposed to fewer germs we can’t build up immunities to them. Fortunately, dogs are covered in germs! Having a dog in the house means more bacteria enters the home and gets inside the occupants (one study found “dog-related biodiversity” is especially high on pillowcases.) In turn, people with dogs seem to get ill less frequently and less severely than people with cats or no pets.


While dogs can be one of the worst triggers for people with allergies, growing up in a house with a dog makes children less likely to develop allergies over the course of their lives. Even if you were just a fetus when your mother lived with a dog, you are still less likely to be bothered by animal hair and dander, or to develop eczema as an adult.


Dog owners are less likely to suffer from depression than non-pet owners. Even for those people who do become clinically depressed, having a pet to take care of can help them out of a depressive episode, in some cases more effectively even than medication. Since taking care of a dog requires a routine and forces you to stay at least a little active, it is harder to stay inside feeling down all the time. The interaction with and love received from a dog can also help people stay positive. Even the mere act of looking at your pet increases the amount of Oxytocin, the “feel good” chemical, in the brain.


Everything about owning a dog seems to lend itself to better heart health. Just the act of petting a dog lowers heart rate and blood pressure. A Chinese study found that people who own dogs get better sleep at night and are sick less often. Other studies show pet owners have slightly lower cholesterol and are more likely to survive a heart attack.


While other pets have positive effects on your health as well, dogs have the added benefit of needing to be walked and played with numerous times a day. This means most dog owners get the recommended minimum 30 minutes of exercise a day, lowering their risk of cardiovascular disease and keeping them in better overall shape than cat owners or people without pets.


Polls show people trust others who have dogs more than just random people walking on the street and are more likely to go up and interact with them. Even if you live alone, having a dog has the same emotional benefit as that of a human friendship.


Your dog could save your life one day. It seems that our canine friends have the ability to smell cancer in the human body. Stories abound of owners whose dogs kept sniffing or licking a mole or lump on their body so they got it checked out, discovering it was cancerous. The anecdotal evidence was later backed up by scientific studies. Dogs are so good at this that some of them are trained to detect cancer, in as little as three hours.


The kind of dog you have tells people a lot about your personality. A study in England found a very clear correlation between people’s personalities and what type of dogs they owned; for example, people who owned toy dogs tended to be more intelligent, while owners of utility dogs like Dalmatians and bulldogs were the most conscientious. Other studies have found that dog owners in general are more outgoing and friendly than cat owners. But be careful: Dogs also take on their owners' personality traits, so if you fly off the handle all the time, it might explain why your dog is so aggressive.


The benefits of bringing a dog to work are so increasingly obvious that more companies are catching on. Studies show that people who interact with a pet while working have lower stress levels throughout the day, while people who do not bring a pet see their stress levels increase over time. Dogs in the office also lead to people taking more breaks, to play with or walk the dog, which makes them more energized when they return to work. This, in turn, has been shown to lead to much greater job satisfaction and productivity.


Monday, February 3, 2014

JUST ANOTHER GROUNDHOG DAY: 2014 PREDICTION

Punxsutawney Phil, a famed U.S. groundhog with an even more famous shadow, emerged from his burrow on Sunday and predicted six more weeks of winter, much to the chagrin of those hoping for an early spring.

The rotund rodent exited his subterranean residence at Gobblers Knob in the western Pennsylvania town of Punxsutawney around 7:30 a.m. on Groundhog Day.


The fuzzy forecaster made his appearance to the shouts of “groundhog,” as eager spectators waited to see whether the groundhog – as the legend goes – would see his shadow and predict six more weeks of snow and freezing temperatures. If not, North Americans can expect an early spring.


The annual Groundhog Day event, made more popular by the 1993 film comedy “Groundhog Day” starring Bill Murray, draws thousands of faithful followers from as far away as Australia and Russia.


Tuesday, January 14, 2014

End in sight for painful branding of semi-wild moorland ponies


For decades the semi-wild #ponies found roaming across some of Britain's most beautiful moorland have been identified by the branding on their flanks made with red-hot irons. The practice involves the application of very hot metal to the skin for several seconds until the hide turns a light tan colour.

But now the use of irons is on the way out, following a sustained campaign by #animal welfare organisations that claim the practice harms the #horses. The British Veterinary Association, which supports a ban, has noted that "hot branding is generally carried out without analgesia and is undoubtedly a painful process".

Moorland #pony societies have agreed a code of practice on hot branding and have agreed to use the method of identification only when strictly necessary. The move follows a decision to ban the use of branding in Scotland and is seen as the beginning of the end for hot branding of moorland #ponies.